## ComfyUI Custom Node Setup
-----
### Node + Performance
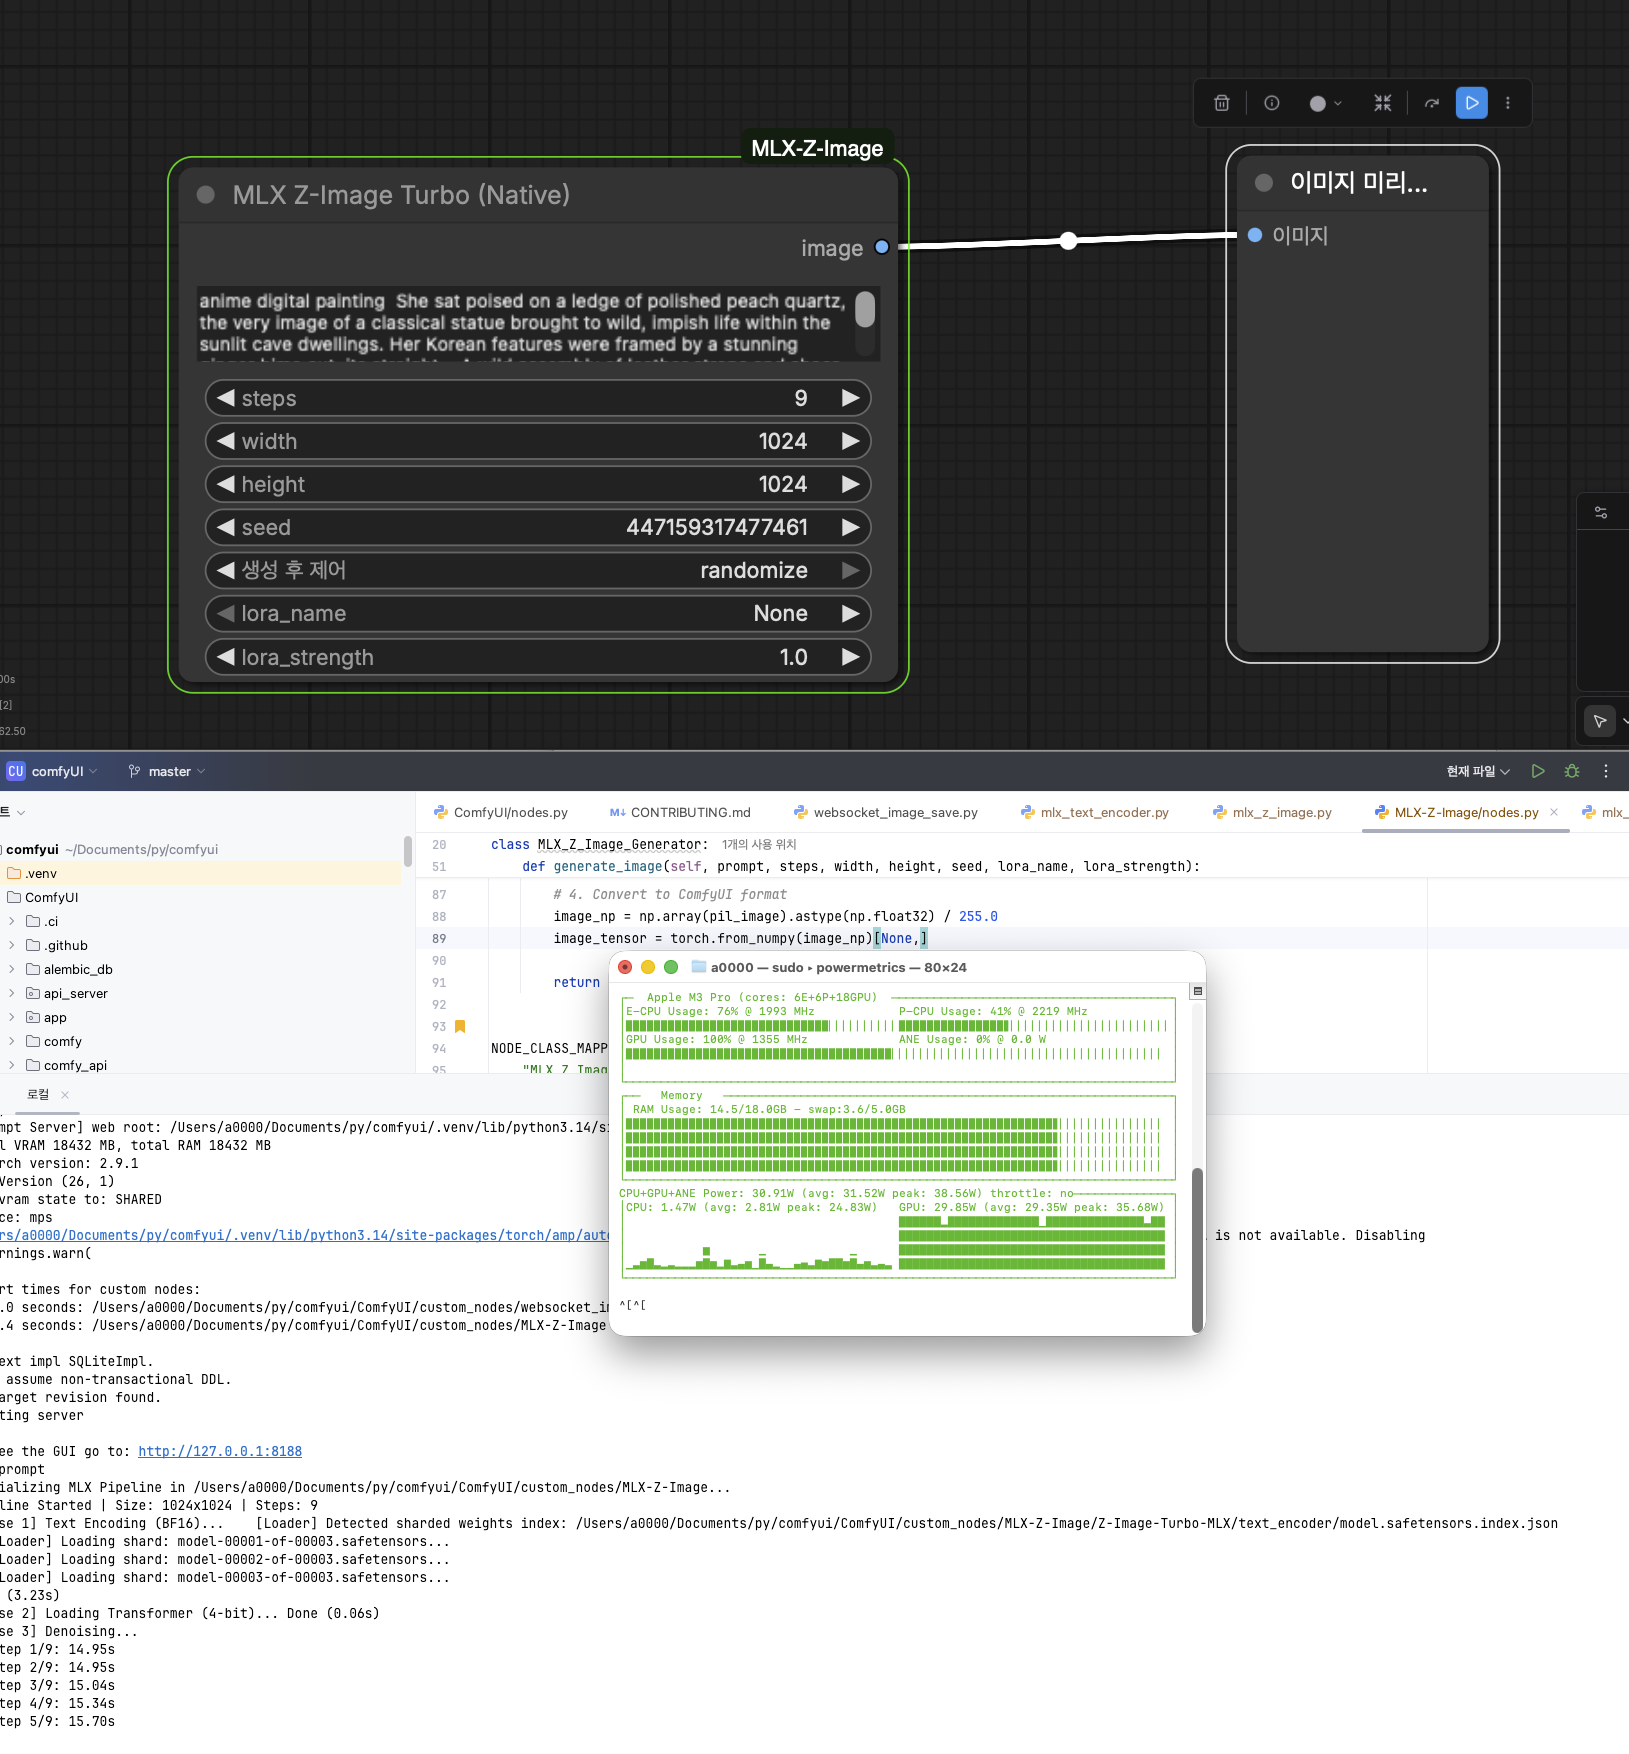 -----
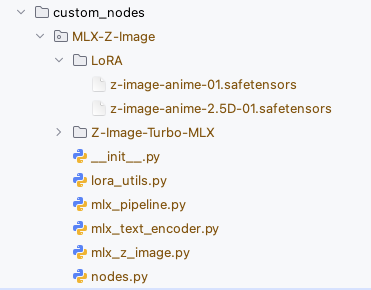
## Project Structure
```text
custom_nodes/
MLX_z-image/
├── LoRA/ # Add LoRa files to this dir
├── Z-Image-Turbo-MLX/ # MLX Weights
├── mlx_text_encoder.py # MLX converted Text Encoder
├── mlx_z_image.py # MLX converted transformer
├── mlx_pipeline.py # mlx Pipeline
├── __init__.py
├── nodes.py # Add node
└── lora_utils.py # LoRA Adaption
````
-----
-----
## Project Structure
```text
custom_nodes/
MLX_z-image/
├── LoRA/ # Add LoRa files to this dir
├── Z-Image-Turbo-MLX/ # MLX Weights
├── mlx_text_encoder.py # MLX converted Text Encoder
├── mlx_z_image.py # MLX converted transformer
├── mlx_pipeline.py # mlx Pipeline
├── __init__.py
├── nodes.py # Add node
└── lora_utils.py # LoRA Adaption
````
-----
 -----
# If you use ComfyUI desktop app
1. Make Directory on your ComfyUI/custom_nodes
-----
# If you use ComfyUI desktop app
1. Make Directory on your ComfyUI/custom_nodes
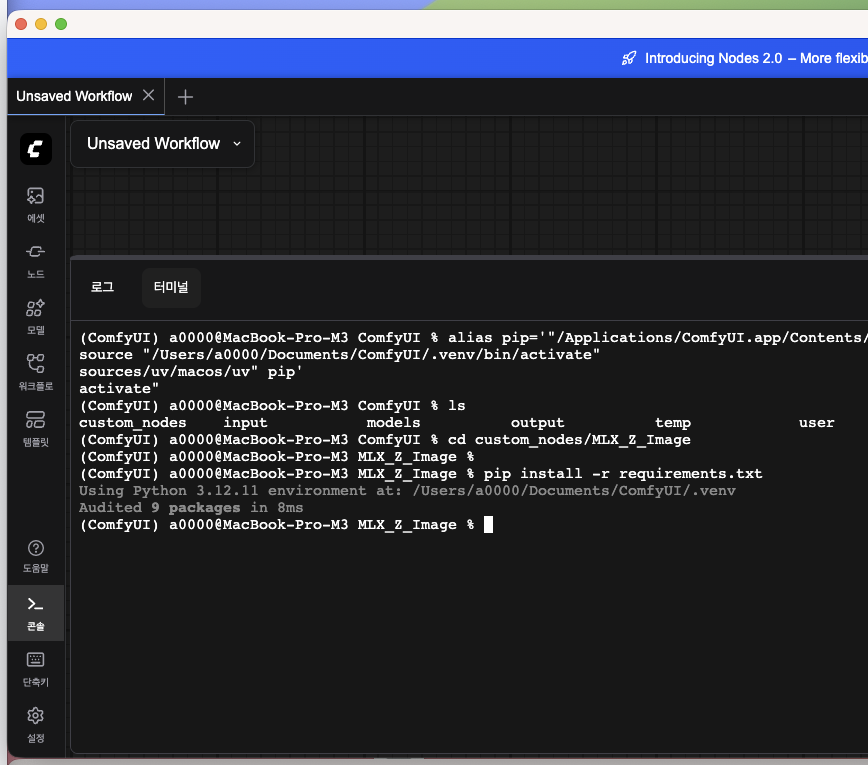
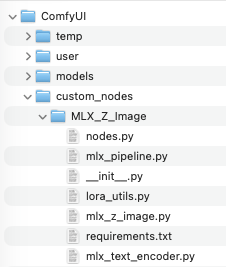 2. In ComfyUI app, go to consol -> terminal
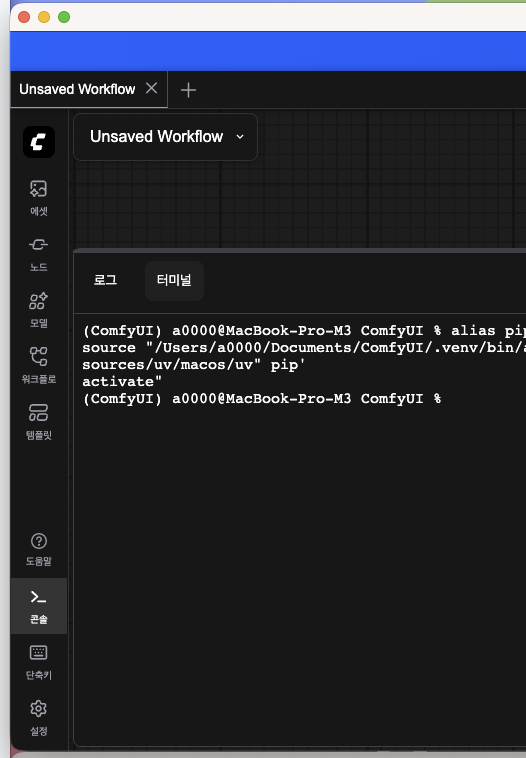 then,
```bash
cd custom_nodes/MLX_Z_Image/
```
```bash
pip install -r requirements.txt
```
then,
```bash
cd custom_nodes/MLX_Z_Image/
```
```bash
pip install -r requirements.txt
```
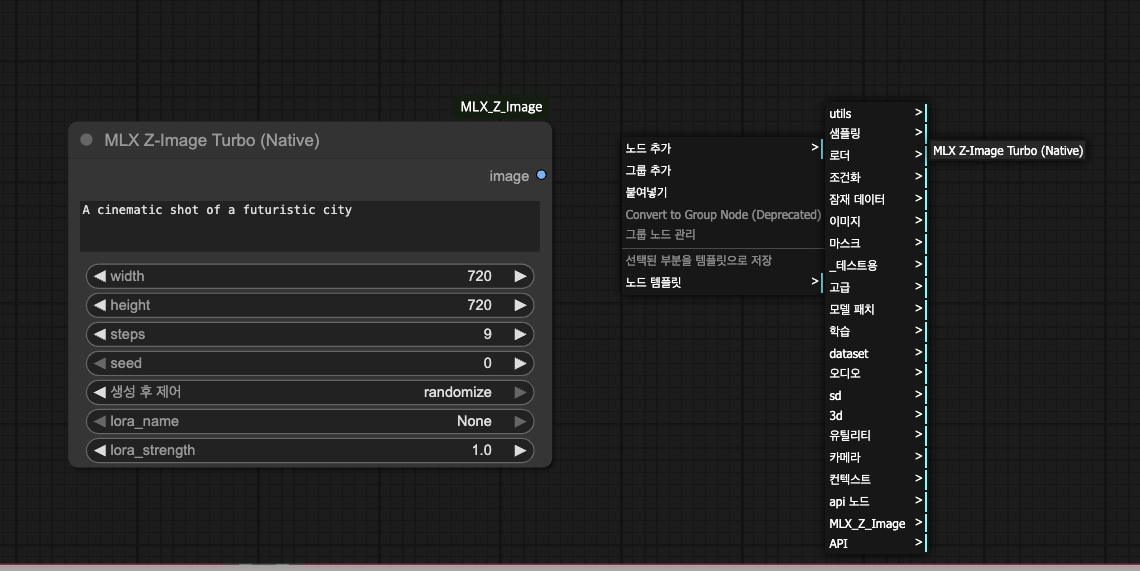
 Restart ComfyUI app
then, custom node appear
Restart ComfyUI app
then, custom node appear
 ## TODO
- [ ] **Multiple LoRA**: Able to apply mutiple LoRA to node.
## TODO
- [ ] **Multiple LoRA**: Able to apply mutiple LoRA to node.